Cookie Policy
Privacy Policy

Summer Nails 2015

Summer Nails 2015

Summer Nails 2015

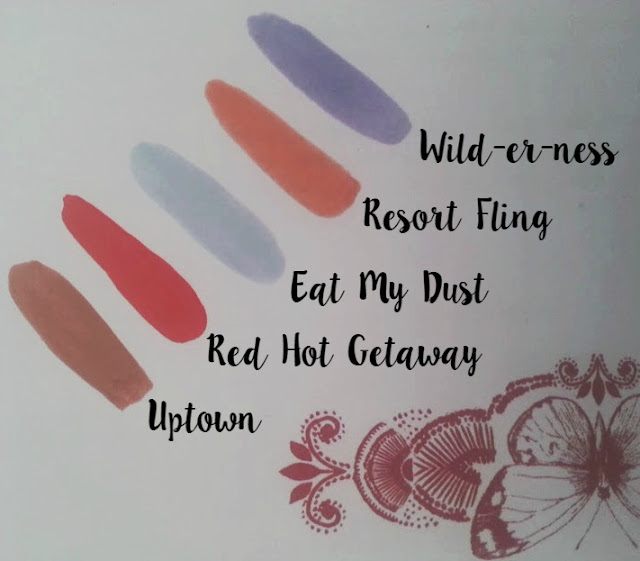
Summer is here and the best thing for me about the change in season is the change in my nail colours. I put away the deep berries and bring out the bright ones, in today's post I am going to give you the low down on my top 5 favourite picks for this year!

Rimmel Wild-er-Ness (£2.99)
Wild-er-Ness from Rimmel is a stunning lavender purple and I adore anything that is purple. This is a colour in-between a pastel and a bright, because it is very subtle. You need two even coats to get the colour in the bottle, since Rimmel have re-branded all their polishes there has been an improvement in the formula. It isn't as thick and the brush doesn't split when you use it.
Essie Resort Fling (£7.99)
I have previously talked about this colour on here already so this will be short and sweet. Out of all the colours mentioned in this post, Resort Fling is by far my favourite. It is a lovely orangey coral colour but isn't blinding that it looks ugly on your fingers. Everything looks good with this colour as well and it screams summer.
BarryM Eat My Dust (£3.99)
The Speedy range from BarryM is a pure stroke of genius and a range that lives by the name 'quick drying'. Eat my Dust is the best colour from the range in my opinion because of its uniqueness. it is a powdery, cornflower blue that has a grey undertone making it flattering to my darker skin tone. It is also a great 'toe nail colour' for the summer.
Maybelline Red Hot Getaway (£4.49)
This is the newest polish in my collection, I picked it up the other week after seeing the words NEW next to it in Superdrug. I haven't red much about this new shade from the range but let me tell you, it is amazing. It can be best described as a muted pink coral and looks perfect with a tan! It is currently on my toes and fingers because I am in love with it that much. These also do actually last for 7 days like it says - highly recommend buying them.
Nails Inc Uptown (£15.00)
Nails Inc have got the gel effect look for half the price thing nailed down. The shade Uptown isn't as bright as the rest of my picks but sometimes a nice nude nail polish is just what you need during the summer months.

These are my top 5 five, what are yours?


3 Steps To Summer Ready Legs

Sun's Out, Leg's Out! Am I right? The sweaters and thick wooly jumpers are away and the shorts and floral dresses are out. But sometimes it can be scary getting your bare legs out after they have been hibernating for 6 months. Which means you need to pay some serious attention to your skin, including face, arms and most importantly legs. Here are a few simple steps you can take to achieve those silky soft legs and it really isn't that hard!
3 Steps To Summer Ready Legs


Step 1 - Exfoliate


3 Steps To Summer Ready Legs

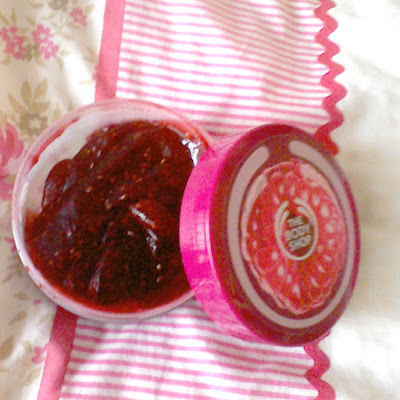
 I love using TBS Raspberry Body Scrub, it gets rid of dead skin cells and leaves your legs ready for all the moisturiser you will be putting on later. Apply the scrub in circular motions to make sure you get to each part of your leg. It is also super easy to make a scrub at home, just take equal parts of olive oil and sugar! It is very simple to exfoliate, and if you do it regularly then you will see a big difference.


Step 2 - De Fuzz

3 Steps To Summer Ready Legs


To keep my legs looking fabulous I have always gone with waxing as it is the most convenient method to keep the hair away for weeks meaning you don't have to worry. This is because it removes the hair from the root, after each wax the hair grows back finer and slower. Since the age of 13 in fact I have had my legs waxed, and let me tell you it hurts. People will tell you 'oh you get used to it after a while' 'it just feels like a small pinch', lies. I am still not used to the pain of waxing, yes it is quick, yes the pain is only for a second but that second kills. I tend to get my waxing done professionally, this in the long run can be expensive with some places charging £15 for half a leg. Now I have converted to at home waxing, which is scarier than the actual pain.

3 Steps To Summer Ready Legs

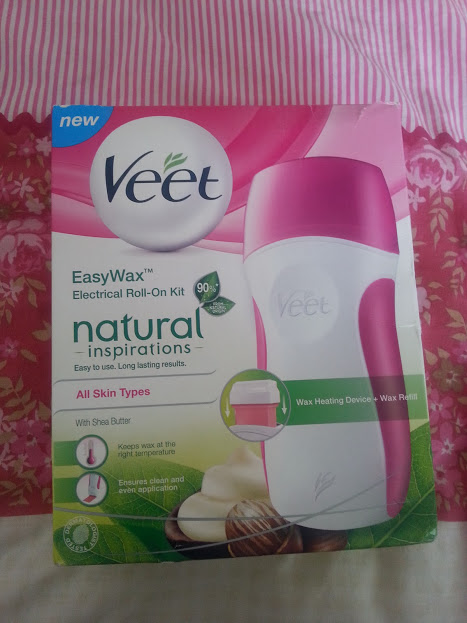
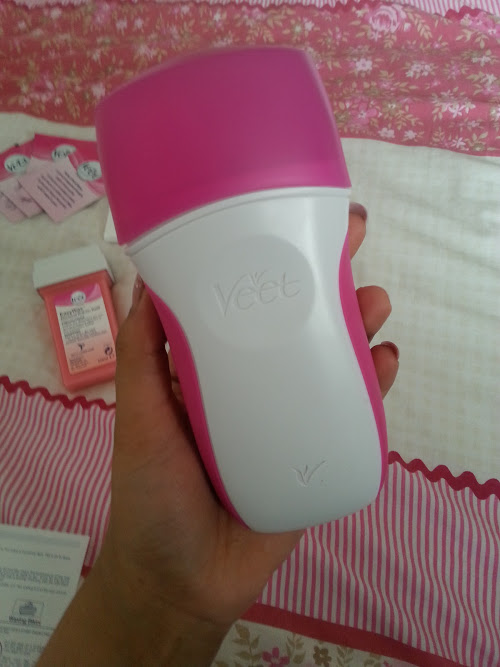
The latest gadget I have trying out is the Veet Easy Wax Roll On Kit*, it comes with the roller, a wax packet (replacement wax is available to buy), strips, wipes and a plug to charge it up. It is really easy to use as well, all you do is put the wax inside the roller and plug it in so that it charges up for 20 minutes. Then you can apply the way onto your underarms, legs and bikini line. The wax is only ready when it applies evenly + smoothly otherwise leave it plugged for longer. Apply the wax in the direction of the hair growth, place your strip over and pull. TIP: The quicker you pull the more effective. 

It honestly doesn't hurt, I promise you that the more you do it the easier it become and you get used to the pain. The at home kits from Veet make life so much easier, you can do it when you want to and in the comfort of your own home. 

The Other Option

Of course there are other options for removing hair, apart from shaving which I think is tiring because you have to do it every single day. The other option which isn't as scary as waxing and lasts just as long is a depilatory cream, all you do is apply the cream wait for 5-10 minutes and then remove it. The 'In-Shower' one is amazing, you can take it off using the sponge in the shower and it makes life a lot easier.

Step 3 - Lock in the Moisture

3 Steps To Summer Ready Legs

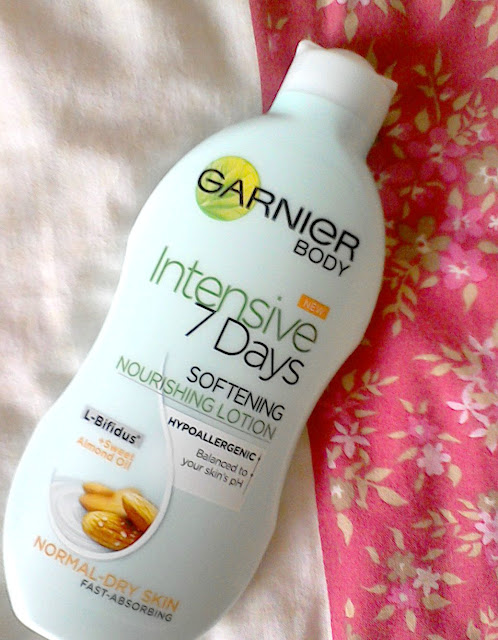
After waxing you have to be really careful, as the skin can get irritant. Try to avoid covering your legs up with tight fitting clothes it can feel very uncomfortable, and if it does feel itchy just try to ignore it. So, your legs are clean, hair free now they need to silky soft. Apply as much moisturiser as you can whenever you can, it will leave your legs looking gorgeous and if you use one with a gradual tan in then your legs will have a lovely colour to them as well. This one from Garnier is great if you have dry skin as it moisturisers your skin and keeps the soft feeling even after you stop using it.


There you have it, three easy steps to getting summer ready legs and that will leave you feeling 100% confident about showing off those pins!


*post in collaboration with Veet, all opinions and stories are my own*

Summer Beauty Haul

Summer Beauty Haul
Summer is here and it is fair to say that my makeup collection needed a revamp, so i headed on a shopping trip and two hours later my bank balance was worse off!! 
Summer Beauty Haul
I was very kindly treated to a MAC make over for my birthday, something i have never done and so had no idea I was allowed to buy something! I couldn't decide between two things, so ended up picking them both up and paying the difference. The first is the Pro Longwear Foundation, and the second is the Natural Radiance Primer to wear underneath as my base. My skin looked flawless with both of these on and had a very subtle glow - I am excited to try them out for myself at a few events. The other high end purchase is the Benefit Roller Lash, I have several mini samples of this when it was a freebie in Elle and it was about time I got the full size version. Love everything about thid mascara even the weird packaging. 

Summer Beauty Haul
Along with the MAC foundation I picked up my two favourites from L'Oreal. They were on two for twelve so I couldn't resist. The Infallible Matte and Original are two that I swear by for everyday and the sun been out has meant a shade change. From Maybelline I picked up the Fit Me Concealer and the Master Sculpt, two never before tried products and a change in concealer from the collection one is very refreshing. I keep hearing Anna from ViviannaDoesMakeup talking about the Bourjois Healthy Balance Powder, how amazing it is. When I saw it in the shops I just had to buy it. It is a very fine powder and so lightweight compared to anything I have used before - the compact is great for being on the go too!

Summer Beauty Haul
Recently, I have become bad at buying mascaras and eye shadows. In the last month I have picked up the Maybelline Colour Tattoo in On and On Bronze,bit late to the party and no idea why these things are bloody amazing!! Late to the party on the gorgeous Collection Eyes Uncovered Palettes, which are just as good as the hype around them. And lastly the Bourjois Colourband, this is still been tested out as I can't get to grips with the concept?? But what I can get to grips with is the Maybelline Color Drama in In With The Coral more of a barbie pink than coral yet still great for the summer.

Summer Beauty Haul

Ahhh, the end. Finishing the summer haul with a Maybelline Polish in Red Hot Getaway,which you will not stop hearing about in the next few weeks as I am a tiny little bit addicted to it. And the life changing Bourjois Instant Dry Drops which you apply onto wet nails and within a few minutes they are dry and ready to roll.


Hope you enjoyed this summer haul! What have you been picking up?


2 Bright & Bold Indian Wedding Guest Looks

2 Bright & Bold Indian Wedding Guest Looks

Hey, it’s Aamira and I’m back! 
Parie is letting me write for her blog for a third time now (thank you so much Parie!) 
Recently, my cousin and neighbour have both gotten married in the space of two weeks and I have had the honour of going to both of them! Going to weddings and being part of their happiness is a memory within a memory! Congrats to both of the couples.
Wedding Look #1
2 Bright & Bold Indian Wedding Guest Looks

So, the first wedding was my neighbours! For this wedding, I decided to wear a long - a really long - bottle green dress. As always, I look for inspiration of makeup looks on Instagram and then create my own look. From all the inspirational pictures, I supported an Arabic-style eye with a green smoky eye.
2 Bright & Bold Indian Wedding Guest Looks

When creating an Arabic eye, a clean crisp line in a necessity. For this, I places sellotape from the outer corner of my eye to the end of my eyebrow. I then added my ‘Collection 2000’ Concealer in shade 1 over my base to act as a base and then to prevent creasing. 

Using a shading brush, I added the Emerald Green colour from the ‘Victoria Jackson Eye Shadow Palette’. I added this all over my lid and up to my crease. Tip: To intensify the colour, try using a damp brush to apply the colour. 

I then used a mixture of ‘Blackheart’ from the ‘Naked 3 Palette’ and ‘Creep’ from the ‘Naked Palette’ on the outer edge to create that smoky eye. I used these 2 shades of black to get an intense black shade. I added this using a fluffy blending brush making sure I only add it to the outer third of the eye. Tip: For a smoky eye, start with small amounts of product and they layer more product. This leads to less room for mistakes (trust me, too much product=panda eyes). 

To blend the colour, windscreen wiper motions are your best friend! I slightly blended this black into the crease but focused the blending into the green. After I was happy with my blending, I added more of the Emerald Green colour using my finger. 

To line my eyes, I used ‘Collection 2000’s Felt Tip Liner’ and lined my eyes using my tape as a guide. As I have small eyelid space, my eyeliner was pretty thin. 

Now, to remove the tape!

I lined my waterline using ‘Urban Decay’s Perversion Eyeliner’ and lined the entire waterline and creating a little point in the inner corner. I then ran a little but on the Emerald Green colour on my lash line. I then used ‘Maybelline’s Rocket Lashes Mascara’ on my top lashes and ‘Urban Decay’s Perversion Mascara’ on my bottom lashes.
2 Bright & Bold Indian Wedding Guest Looks


I concealed my dark circles with ‘Collection 2000 Concealer’ and used my ring finger to blend it in. For foundation, I then used a mixture of Body Shop’s Foundation in shade 08 and MAC’s ‘Pro Longwear Foundation’ in shade NC 35. I used a buffing brush to blend this into my skin and obtain that flawless finish. 

To contour, I used the matte brown colour from the ‘MUA Eyeshadow Palette’ and used a contour brush to slightly sculpt out my cheekbones and jawline. I also used this colour to slightly contour my nose. For blush, I used ‘FX’s Mineral Puff Blush’ in ‘Desert Rose’ and applied that to the apples of my cheeks. For highlight, I used the highlighter from the ‘Urban Decay – On The Run Palette’ and applied it on my cheekbones using my fingers. 

For my lips, I lined them and filled them with a Maroon Lip Liner.
2 Bright & Bold Indian Wedding Guest Looks

Wedding #2

Now for my cousins wedding! For this wedding, I was wearing a really heavy Royal Blue flowy dress with silver and gold embroidery all over the dress. For this part of the post, I shall just be focusing on the eyes as the products that I used on my face the same products as ‘Wedding #1’.

2 Bright & Bold Indian Wedding Guest Looks

For this look, I stuck sellotape from the outer corner of my eye to the corner of my eyebrow. I used ‘Collection 2000’s Concealer’ as a base. I then applied the gold shade from the ‘No.7 Eyeshadow Palette’ and using the shader brush, applied this all over my lid. Then using the Royal Blue shade from MAC’s Eyeshadow Palette, I applied this to the outer half of my eye using the other side of the shader brush. To blend these two colours together, I used my fingers. For the outer V of my eye, I added ‘Blackheart’ from the ‘Naked 3 Palette’ and then blended it into the Royal Blue colour. To line my eyes, I used ‘Collection 2000’s Felt Tip Liner’ and I used ‘Urban Decay Perversion Mascara’ on both my top and bottom lashes. To highlight the inner corner, I used the highlighter that came in ‘Urban Decay – On The Run Palette’.
2 Bright & Bold Indian Wedding Guest Looks

For lips, I used a light pink lip gloss which completed my look! Hope you enjoyed reading this and try to recreate this look or maybe add a twist to it.
Thank you,
Aamira x
Stay Beautiful!

Aamira has recently created a instagram showcasing all her beautiful makeup looks follow her @aamira.m 


Thank you Aamira for the lovely guest post! If you would like to guest post on classandglitter then please email me at pariejoshi@hotmail.co.uk