Cookie Policy
Privacy Policy

Accidental Makeup Revolution Haul


Makeup Revolution Haul


I went on the Makeup Revolution website and next thing I know a few products were added into my basket and then an email came to me saying' Thank you for placing your order'. I have been eyeing up some things from them quite a lot recently, mainly after their new lines were added so I went for it! And know my local superdrug back home stocks MR! More for me...


£14,99
This was the first thing to go into my basket. MR have recently launched a new range of makeup brushes and I have just splurged on some others so had to keep this spend short and sweet. I went with this set as for the price I thought it was amazing. The brushes are tiny compared to my others so I am hoping they work well. And it came with a sponge, and my real techniques one is coming to an end :(
(I bought it separately, but now it is part of a set)
This reminds me of the beauty blender and I am wanting to get one to do a comparison for you all and see what is it like. Its a lovely little sponge and I can't wait to use it. Will report back as soon as! 
New-trals vs Neutrals Palette
£6.99
How beautiful is this palette!!!! As soon as it arrived it just screamed autumn to me and I can't wait to get out of my comfort zone a little bit and use the daring shades. The top row is what I am most excited to use.
Pro Fix Oil Control Fixing Spray 
£5.00
The most exciting purchase of them all, I have to say and one that I can already give my opinion on. I love the idea of setting sprays, they seem to make other peoples makeup last very long and I always wonder if it would do the same for my makeup but which one to get is the question. When I saw this retailing for just £5 I just had to get it. Boy am I glad I did. This spray has kept so much of my makeup in place, controls oil in my tzone and you can't feel it! I have a full review coming up very soon!

Have you tried anything from MR recently?!
 

Home Away From Home

Since moving out to university, I have realised that having my own little space can sometimes get a bit boring. At home you have everything you need and for me I was in the same bedroom for years so everything had its own place. Whereas now I have two rooms that I live between and struggle to decided what to have where. I want to do a full university room tour one day but the problem is that most of it is boring! So in today's post I am sharing with you some little things I do to make my room feel like home. 
university-room-tour

I absolutely love my hot drinks, whether this be coffee, hot chocolate or even a good old cup of tea. On my top shelf I keep a stash of emergency hot beverages. In the Tea container I have tea bags, hot chocolate sachets and my new favourite thing mint mocha (its so good!). Then I have a sugar canister which hardly gets touched but I just have to have it. Both the containers are from Quality Save and I adore them. The print is very vintage and gorgeous. 

university-room-tour

university-room-tour
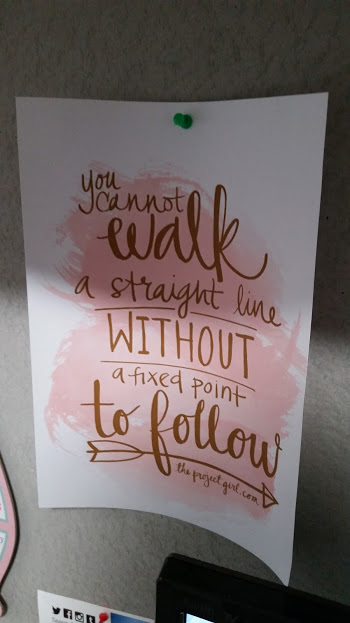
Also on the top shelf I have a few things close to my heart. One of them been a Cinderella snow globe, she is my favourite princess out of all of them and I love just having her in my room with me. Then I have this little plaque with a motivational quote on, it gives me something to smile at every time I see it. Finally, I have the only photo in my entire room. I really need to get some more printed off, but this is of my family and who doesn't love a good old selfie. Plus the frame is glittery and I love anything glitter. On the notice board above my desk I have a few printed out quotes. I think having little saying that are motivational/inspirational are a great pick me up. Find them on pinterest and print them out, no need to buy any fancy ones. 
These little quotes are what really makes my room feel more welcoming, they are all bright and in your face. When you start looking for universities to go, it is always important to look at the Student Accommodation that is available. You want to have something that is cosy and manageable, where I am everything is on campus, which makes my life easier and the halls aren't that bad. It isn't always this easy so then why not live off campus? When I was looking at Northumbria University I didn't like the halls and started looking for off campus spaces. Letslivehere offer some great accommodation in the Newcastle area, so well worth considering living out of the university complex. 

university-room-tour
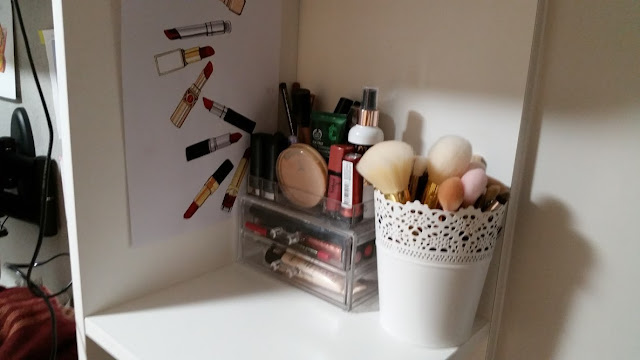
My favourite part of my entire room has to be the little make-up station thing I have going on. I have a pinterest print stuck on the wall and then a mini acrylic organiser. As you can see it is heaving with things and that is because of my lip product addiction - there just isn't enough room to put them all somewhere. Then I have a Ikea plant pot that stores all my brushes in, the white fits with the whole room and completes it. 

There's a little sneak peek at my room! There are so many things I still want to do with it, add some fairy lights above my bed, print out more photos and de clutter. Currently I have lots of things everywhere and it really needs sorting out! 

Welcome to my Home Away From Home! 


*Collaboration with Letslivehere*

What I've Been Loving - Bourjois Instant Dry Nail Drops

Bourjois Instant Dry Nail Drops

Bourjois Instant Dry Nail Drops

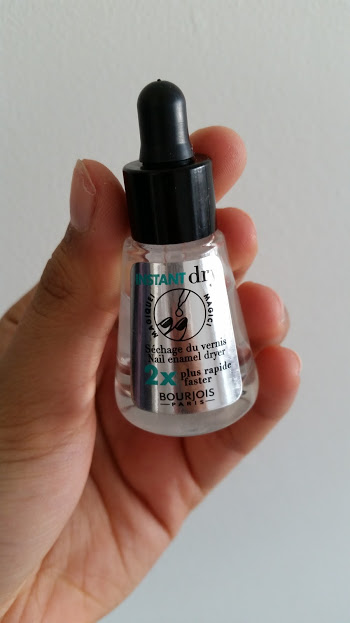
The Bourjois Instant Dry Nail Drops do exactly what it says on the tin to put it across simply. The nail drops are designed to be used after you have applied your polish and your top coat to speed up the nail drying process. 

You use the pipette to apply the tiniest amount of this best described as 'oil' to your nails. Best applied to the center of your nails and then it spreads out to cover the whole thing. You then leave it for around a minute and then voila your nails are dry. I find that rubbing the 'oil' in works the best and nourishes your cuticles at the same time. 

This is just one of the many things from Bourjois that makes painting nails fun and exciting! If you have no patience to wait for your nails to dry then try these nail drops and you will wish you'd discovered them earlier! 


Ferrero Rocher Cupcakes with Nutella Frosting


I sometimes have this urge to bake, it can come at the most random times and when it does I love it! This time around I had the feeling that I wanted to make something sweet and chocolaty so I decided to make these super easy Ferrero Rocher Cupcakes with Nutella Frosting! I wasn't planing on writing a post on them but due to popular demand on instagram here goes! p.s I am no professional baker so use your own recipe and methods if it suits you! 
Ferrero Rocher Cupcakes with Nutella Frosting

Ferrero Rocher Cupcakes with Nutella Frosting

This Recipe Makes 16 Cupcakes

Cupcakes:

188g of Self-Raising Flour
155g of Butter or Margarine
1/2 Teaspoon of Baking Soda
2 Teaspoons of Bicarb of Soda
3 Tablespoons of Cocoa Powder
150g of Caster Sugar
1 Cup of Milk 
NOTE - My family don't eat eggs, making this an eggless recipe if you do eat eggs then you can adapt the recipe. Minus the milk, bicarb of soda and add 2 large eggs instead. 

Frosting:

150g of butter or margarine 
185g of Icing Sugar
Generous Amount of Nutella (this is all up to personal preference, I added loads!)

Decoration:

Ferrero Rocher's 
Strawberries
Anything !

To Make the Cupcakes: 
(Pre-Heat at 180 Degrees)
1. Sift the all the dry ingredients into one bowl and set aside, in another mixing bowl you want to start creaming the butter and sugar together until it makes a pomade (goes fluffy). Make sure you butter is soft before using. 

2. Add in half of the dry ingredients and half of the milk and carry on mixing until thoroughly combined. You then want to add the rest of the mixture and the milk and make sure that everything is mixed well until smooth. At this point if you are following the eggless recipe then you may have to add some more milk. (Where I have put milk, is the equivalent of 1 egg)

3. Divide the batter between the cupcake cases that you own, mine are from Poundworld! Pop into the oven on the second shelf for 20 minutes. Depending on your oven they may take longer, so just check by inserting a cocktail stick and seeing if it comes out clean or not. Clean = Ready

4. Take them out to cool and start making the frosting - the tasty part! Add the butter into a mixing bowl and make it go like a pomade similar to the cupcakes, the sift in the icing sugar until its nice and fluffy. Then you add all the Nutella you want and go crazy if you want a rich colour and rich taste, and go light if you don't want it to overpower the cake. We ended up adding around 5 heaped tablespoons but I could have added more. 

5. I then took a piping bag and very badly piped each cupcake, gave up in the end and used a spoon to apply the mixture. Then add your decoration and they are ready to eat! 

Hope you enjoyed reading, and let me know if you make them!