Cookie Policy
Privacy Policy

2 Bright & Bold Indian Wedding Guest Looks

2 Bright & Bold Indian Wedding Guest Looks

Hey, it’s Aamira and I’m back! 
Parie is letting me write for her blog for a third time now (thank you so much Parie!) 
Recently, my cousin and neighbour have both gotten married in the space of two weeks and I have had the honour of going to both of them! Going to weddings and being part of their happiness is a memory within a memory! Congrats to both of the couples.
Wedding Look #1
2 Bright & Bold Indian Wedding Guest Looks

So, the first wedding was my neighbours! For this wedding, I decided to wear a long - a really long - bottle green dress. As always, I look for inspiration of makeup looks on Instagram and then create my own look. From all the inspirational pictures, I supported an Arabic-style eye with a green smoky eye.
2 Bright & Bold Indian Wedding Guest Looks

When creating an Arabic eye, a clean crisp line in a necessity. For this, I places sellotape from the outer corner of my eye to the end of my eyebrow. I then added my ‘Collection 2000’ Concealer in shade 1 over my base to act as a base and then to prevent creasing. 

Using a shading brush, I added the Emerald Green colour from the ‘Victoria Jackson Eye Shadow Palette’. I added this all over my lid and up to my crease. Tip: To intensify the colour, try using a damp brush to apply the colour. 

I then used a mixture of ‘Blackheart’ from the ‘Naked 3 Palette’ and ‘Creep’ from the ‘Naked Palette’ on the outer edge to create that smoky eye. I used these 2 shades of black to get an intense black shade. I added this using a fluffy blending brush making sure I only add it to the outer third of the eye. Tip: For a smoky eye, start with small amounts of product and they layer more product. This leads to less room for mistakes (trust me, too much product=panda eyes). 

To blend the colour, windscreen wiper motions are your best friend! I slightly blended this black into the crease but focused the blending into the green. After I was happy with my blending, I added more of the Emerald Green colour using my finger. 

To line my eyes, I used ‘Collection 2000’s Felt Tip Liner’ and lined my eyes using my tape as a guide. As I have small eyelid space, my eyeliner was pretty thin. 

Now, to remove the tape!

I lined my waterline using ‘Urban Decay’s Perversion Eyeliner’ and lined the entire waterline and creating a little point in the inner corner. I then ran a little but on the Emerald Green colour on my lash line. I then used ‘Maybelline’s Rocket Lashes Mascara’ on my top lashes and ‘Urban Decay’s Perversion Mascara’ on my bottom lashes.
2 Bright & Bold Indian Wedding Guest Looks


I concealed my dark circles with ‘Collection 2000 Concealer’ and used my ring finger to blend it in. For foundation, I then used a mixture of Body Shop’s Foundation in shade 08 and MAC’s ‘Pro Longwear Foundation’ in shade NC 35. I used a buffing brush to blend this into my skin and obtain that flawless finish. 

To contour, I used the matte brown colour from the ‘MUA Eyeshadow Palette’ and used a contour brush to slightly sculpt out my cheekbones and jawline. I also used this colour to slightly contour my nose. For blush, I used ‘FX’s Mineral Puff Blush’ in ‘Desert Rose’ and applied that to the apples of my cheeks. For highlight, I used the highlighter from the ‘Urban Decay – On The Run Palette’ and applied it on my cheekbones using my fingers. 

For my lips, I lined them and filled them with a Maroon Lip Liner.
2 Bright & Bold Indian Wedding Guest Looks

Wedding #2

Now for my cousins wedding! For this wedding, I was wearing a really heavy Royal Blue flowy dress with silver and gold embroidery all over the dress. For this part of the post, I shall just be focusing on the eyes as the products that I used on my face the same products as ‘Wedding #1’.

2 Bright & Bold Indian Wedding Guest Looks

For this look, I stuck sellotape from the outer corner of my eye to the corner of my eyebrow. I used ‘Collection 2000’s Concealer’ as a base. I then applied the gold shade from the ‘No.7 Eyeshadow Palette’ and using the shader brush, applied this all over my lid. Then using the Royal Blue shade from MAC’s Eyeshadow Palette, I applied this to the outer half of my eye using the other side of the shader brush. To blend these two colours together, I used my fingers. For the outer V of my eye, I added ‘Blackheart’ from the ‘Naked 3 Palette’ and then blended it into the Royal Blue colour. To line my eyes, I used ‘Collection 2000’s Felt Tip Liner’ and I used ‘Urban Decay Perversion Mascara’ on both my top and bottom lashes. To highlight the inner corner, I used the highlighter that came in ‘Urban Decay – On The Run Palette’.
2 Bright & Bold Indian Wedding Guest Looks

For lips, I used a light pink lip gloss which completed my look! Hope you enjoyed reading this and try to recreate this look or maybe add a twist to it.
Thank you,
Aamira x
Stay Beautiful!

Aamira has recently created a instagram showcasing all her beautiful makeup looks follow her @aamira.m 


Thank you Aamira for the lovely guest post! If you would like to guest post on classandglitter then please email me at pariejoshi@hotmail.co.uk

MUA Pro-Base Prime & Conceal Palette Review


MUA PRO BASE PRIME AND CONCEAL

MUA Pro-Base Prime & Conceal Palette Review


MUA Pro-Base Prime & Conceal Palette Review

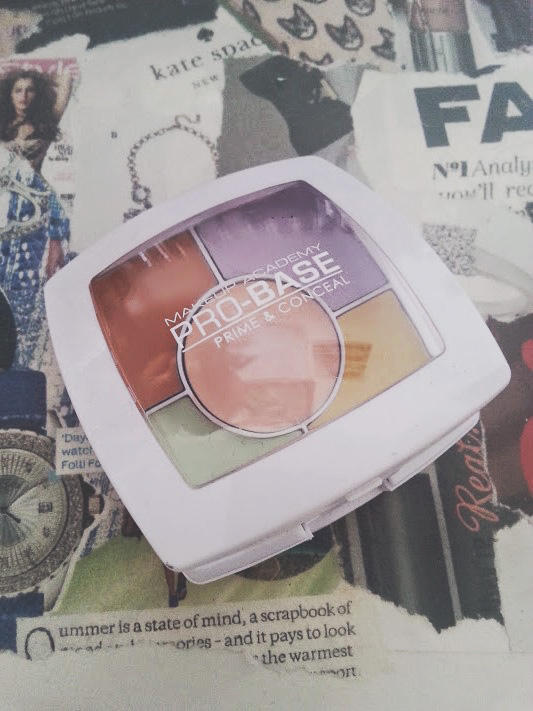
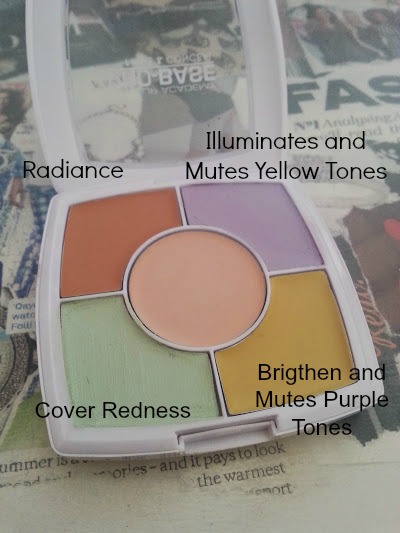
The MUA Prime and Conceal Palette is something that is only £4 but is actually life changing. The little pot of concealers come with four different colour correctors and a highlighter, to help you with evening out your complexion. Each little section is designed to work differently, target a different area of your face and help with making your makeup go on easier. 
Top Left - Peach 
The shade of this concealer helps to add radiance to your skin and is perfect for covering up your dark circles. 
Top Right - Purple
If you are tired or your skin feels a bit dull then the lilac concealer will counteract this.  
Bottom Left - Green
Redness of your skin/spots that look a bit tuck then this concealer will work against it and make them appear neutral
Bottom Right - Yellow
This is the third one that helps with dark circles and also on any dark patches, this one is more for the darker skin tones like me
Centre - Great for a subtle highlighter on top of your makeup

All of the concealers are great for a range of different things, you don't even have to use them for what it says. For example I use the purple one under my eyes, the green on redness, yellow where I have discolouration and the purple isn't really used as much. It is more about experimenting and finding out which is best for you, the bright colours of the concealer can be very scary, I was at first! But you only need to apply the smallest amount on your face and slightly blend it in with your finger but not completely blend it in as you can apply your foundation on top and it will just disappear. 

This is an amazing deal and palette that you can buy if you have skin issues likes me, MUA is also always on offer so keep a look out. If you don't think you will get much use out of all five of these, then the concealers are also available to buy as individual's which you can find here. And there is also a powder to match the concealer, a tool you use on top and the next thing on my shopping list - find that here.

You can buy the palette from MUA here and see the rest of the range on their site as well! 

Social media and the concept of beauty

Social media and the concept of beauty
Images Found on barefootblonde.com
The appearance of the internet only 25 years ago has changed our world forever. Billions of people go online every day and interact with people in ways that were entirely impossible and unimaginable even to our parents’ generation. 

We are now able to access all types of information and share things that were once shared with our close friends and family only. Take the social media for example: they have completely changed the way we live, from socializing, dating and communicating, to shopping and working. 

Nowadays, if you don’t have a social network profile, it is almost as if you don’t exist. You are on the outskirts of the modern world.

The Impact On Our Status In Society 

Social media and the concept of beauty
Image left Found on badwolfebay.tumblr.com

This has brought about some serious changes in the way how we see and present ourselves, making us more aware of our appearance, our ‘friends’ and our general status in society. We have gone from anonymity to global presence almost overnight. And now we have to play the part, we have to look the best we can, show we are interesting and beautiful and provide continual proof of it.

The Phenomena Of Selfies

Social media and the concept of beauty
Image Found on listal.com

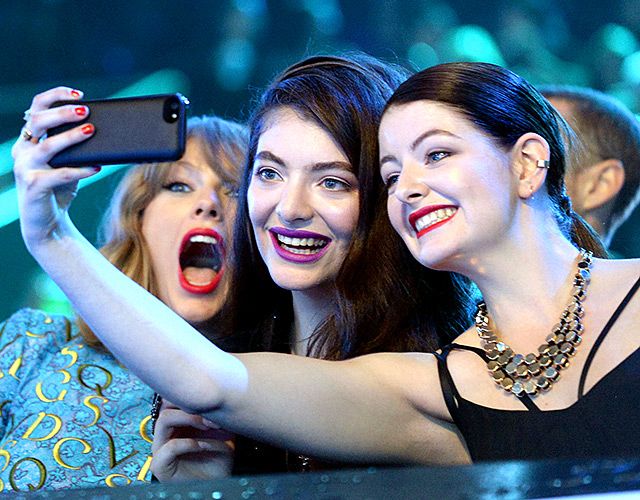
Our ‘walls’ and ‘feeds’ abound with self-portraits, commonly known as ‘selfies’. In the times past, taking photos of yourself and constantly putting them on public display in order to get feedback for your looks would have been considered narcissistic, but in our times it is a given. Everybody has become a photo model and a star in their own movie now, striking best poses and showing their best face. The phenomena of social networks and selfies have changed the paradigms of what beauty is and what is acceptable.

Recent Studies

Social media and the concept of beauty
Image Found on usmagazine.com

Recent Dove studies have shown that 82% of women believe social media are impacting how we define beauty now. The days of magazine top models and TV stars are gone; we used to form our ideas of beauty by looking at them and comparing ourselves to their bodies and feel inadequate to say the least. But nowadays, we have access to many more images of real women and girls who do not look like top models but are beautiful nonetheless. We are slowly but surely redefining our concepts of beauty thanks to the selfie craze!

Make-Overs

Social media and the concept of beauty
Image Found on blog.arnhem.co

Apart from making us more liberal and accepting of cultural and physical differences, selfies have also raised the bar. We tend to think that ‘if so and so can look a certain way, why can’t we’.

Even though there are many photo editing filters people use to optimize their selfies and edit their less desirable features, some people go the extra mile of actually undergoing real life style changes and make-overs. Talking to specialists from the Skin Clinic Penrith we’ve found out that the selfie trend has caused an increase in the number of people having cosmetic procedures like mesotherapy and filler injections. It is certainly far better to use these non-invasive procedures than to try to cover our imperfections with tons of thick make-up which only makes us look older and unnatural.

These days the aim has become to maintain the fresh, youthful and natural look that will get us the biggest amount of likes on our Facebook, Twitter and Instagram profiles, and we do not shy away from achieving it.

Welcome to the future where the best version of yourself is the ideal of beauty!


Author BIO:
Sophia Smith is a freelance writer from Brisbane, Australia with huge interest in beauty, fashion, photography and graphic design. Sophia is also very passionate about social media and DIY projects. She could be described as beauty addict and life lover. She writes in mostly beauty related topics, mainly through blogs and articles.

Find her on:


ProBlo CurlME Review

ProBlo CurlME Review

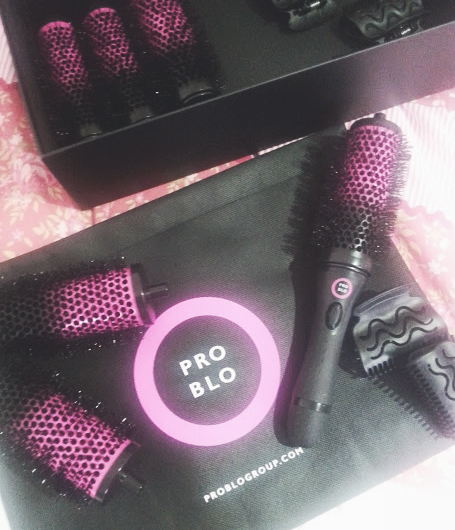
The CurlME is a blow dry brush set that gives you the salon blow dry look at home, it allows you to dry and set your hair at the same time perfect for those special days and an everyday look. I put the CurlMe* to the test to see how it works on my medium and layered hair.

What's Included? 
> 6 Brush Barrels
> 6 Clips
>  Handle
>Travel Bag

ProBlo CurlME Review

How Does It Work? 
> You want to part dry your hair, so it about 60% dry
>Then you want to section your hair, by splitting into 6 sections it will make the entire process easier as there are 6 barrels. Use the clips included to section your hair and then attach the first barrel to the handle.
> Blow dry that section of the hair by pulling down from the root to the end just like your would with a normal brush
> Take that same section of hair and wrap it around the barrel once again, this time around you want to keep it wrapped up and use the clips to hold it in place
>Repeat the last two steps until all sections of your hair is up and secure and then leave your hair to cool down. Around 25 minutes should do it justice
>Once cooled down, remove the barrels in a upwards motion and ta-da! You should be left with a bouncy blow dry just like you have from the hairdressers. 
ProBlo CurlME Review

The Results
Using the set was really easy and I watched this video on their YouTube channel to see how to do it correctly and thank god I did because I wouldn't know! The barrels look huge, but they fit on my hair and I managed to create six sections to put my hair up, it did feel really loose at first and this scared me as I didn't want it to fall out but they stayed in place for about 30 minutes before I removed them. 

I wasn't really expecting much from these brushes as I have had hair that is stubborn my entire life! 
It didn't curl my hair at all, i presume because of the length/layers? But what it did do was add a huge amount of volume into my hair and gave it a lovely bounce, just like a bob should have.

ProBlo has given my hair the boost that it so badly needed. If you are a girl that wants gorgeous hair instantly, then this is for you!  The travel bag that comes included in the set makes it easy to store away and bring along with you when you travel.

I have also started to use just the one barrel on the holder for when i normally dry my hair on a everyday basis. Works just as well not clipping it up. Overall, I am very very impressed with how much my hair routine has changed and there has been no need to use a bunch of products - amazing!

Buy the CurlME for £35 HERE


*PR SAMPLE