Cookie Policy
Privacy Policy

My Personal Planner

Personal Planner
I am now a part of the amazing and crazy planner community. Yes it is a thing. For the past few months I have browsing Etsy and looking at all the amazing stickers you can buy for a planner but I didn't have a planner I was happy with. Something that was perfect for life, blogging and university. Until I came across Personal-Planner. And the next thing I know I made a purchase, created my own planner and constantly updated twitter about it coming to me (follow me @pariejoshi). I thought of giving you a little tour...
Personal Planner
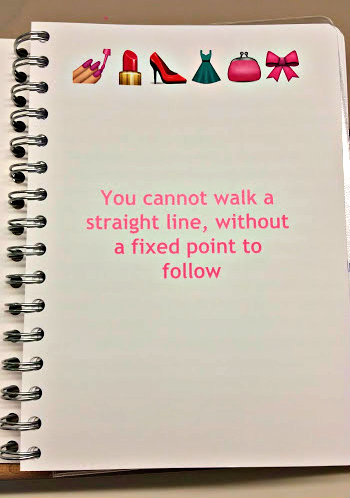
Personal-Planner let you personalise everything and anything so that the planner that you will be using is perfect for you. It starts with choosing the size, I went with A5 but there are other sizes as well, and I think they have a A4 coming too. Then you get to design you front cover, there are lots of patterns and designs you can pick from but I went with my own a lovely quote in gold and polka dot. The other cool thing is the Owner Cover page you get to create, this can include all your personal details but I went with a another quote and my favourite girly emojis. 
Personal Planner
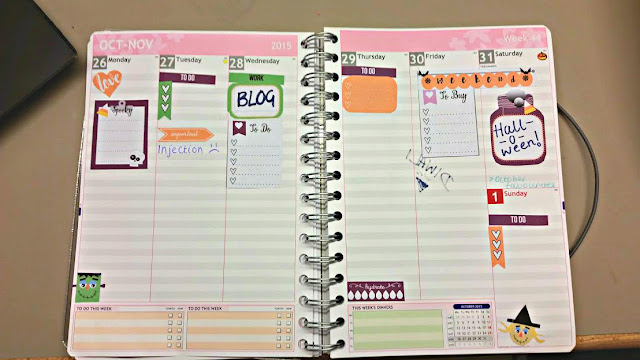
Now, on to the actual planner. another one of the amazing personalisation features of this planner is the colour scheme preference. The gilr inside of me went with pink of course, a little worried after I had picked it but no regrets now I love it! The muted grey is the other colour I picked and it works really well together. You can go as far as picking the design you want on the top of the apge, mine are cute little flowers but options include birds and stripes. Each month starts off with a monthly view, allowing you to put in the most important dates. You also choose the month you want to start with, I went with October and it will finish next October.
Personal Planner
Then we have the weekly view,there are also options on how you want your week to look like. I went with Vertical Ruled (top and bottom) to kind of resemble other planners I have seen. But if this isn't how you work then horizontal views are also available. You can see the muted grey colour here better than before and see that it works together. The main reason I went vertical is so that I can use lots of cute stickers! This week is Halloween themed, not very full or busy like others but cute! This was a printable from VintageGlamStudio, who I found of instagram and helped me with this whole planner thing. Stickers sound childish, but they make the planning process more exciting and fun!
Personal Planner
Personal Planner
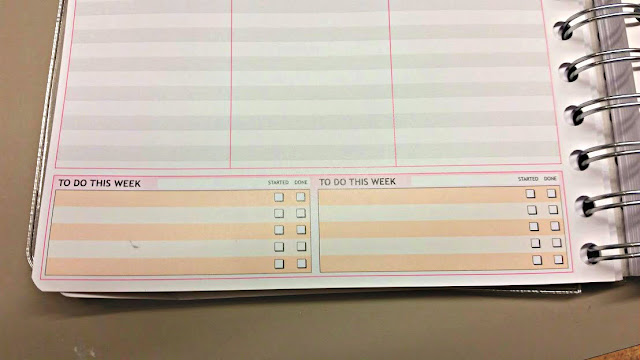
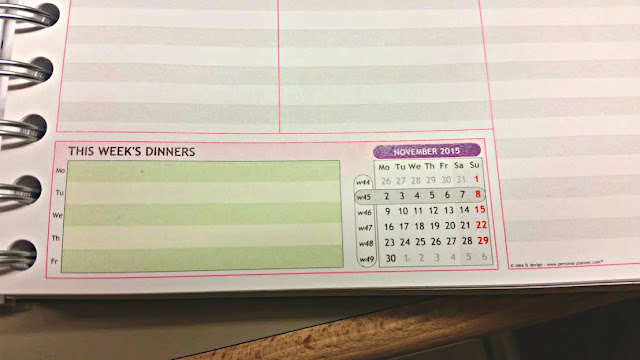
After picking your layout you can choose the items you want on there, you can add personal dates such as birthdays ect so you never forget and also little add ons. I went with To-Do boxes on the left page and a weekly meal planner on the other to help me budget for the week. The other options available are workout schedules and weather. Adding a ruler to come with your planner is another option.
Personal Planner
Personal Planner
Personal PlannerTo make each month easier to find it is colour coded on the edge, and an overview of the next two years can be added to the back of the planner which can help you plan for the year ahead if you have important things to remember. On the back few pages you can choose from lined, square and the newly added colouring pages. I went with lined so that if I need to write something down then then is the best place.                                                                                                                                                                                                                                      
That concludes the planner tour! I have ordered a load of stickers (way more than my bank account can cope with) and will be putting them in a haul very soon. I want to theme everything so November is going to have a colour and then December is going to be all festive! Everything I order will also be from UK sellers so you know what to order and where from. Do you like these types of posts? Planning Addicts Unite! 
                                         

You can buy your own Personal Planner over on their Site! 
 

My Go To Autumnal Makeup Look

Autumnal Makeup Look

Autumnal Makeup Look

Autumnal Makeup Look

Autumnal Makeup Look

Autumnal Makeup Look

In my mind, autumn is well and truly here and the cold weather is making its presence. I thought i would just share my go to current makeup look and the products that I am loving. It all starts with the base for which I use The amazing L'Oreal True Match without any primer underneath (SHOCKER) but this is because the new formula allows me to use it with just moisturiser underneath. Then to hid those awful bag I have been loving the L.A Concealer it covers, lasts well and it incredibly cream then set with the Rimmel Stay Matte.  I skip blusher in the winter and go straight to a little bit of bronzer to give me some colour.

Then for the eyes I have been obsessed with the Little Mix Eyes Palette all the colours are so pigmented and the first three gold shades are perfect for the autumn. Underneath this as a base and a primer I used the Bourjois Colourband in Brun which is pretty much the same colour as my eyelids making it pointless but ah well. For mascara I am still in love with the Benefit Roller Lash it gives my lashes length and they look like spider legs. And on my lower lash line I am started to smudge some brown eyeliner like the MAC lady did a few weeks ago for me, I can't do it as great as her but I try. 

Then for lips the main autumnal focus, for this I mix two different shades of berry/red one of them is the Wet n Wild Lipstick in Cinnamon (which is now available to buy on Amazon eep!) and the Bourjois Velvet Lipstick in Grand Cru together these are like superwoman on my lips.


I guess that gold eyes and berry lips are the standard autumn makeup look, but swapping red for nude is cool too!

What are your autumn must haves? 

SEVENTEEN Define & Conquer Contour Kit Review

Contouring is a technique that we haven't stopped hearing about the past year or so, every brand seems to be bringing out their version of how to do it and every youtuber seems to showing us their way of doing it. All very complicated, it isn't really something that I do on a everyday basis due to the time that it takes, but recently I have been doing more often than usual using the Seventeen Define & Conquer Contour Kit. Retailing at just £5.99 its a makeup steal. The little compact contains an illumination highlighter, with no glitter or shimmer running through it and a warm bronze shade perfect for your contour as it doesn't have a muddy undertone. 

Inside there is also a how to guide to help you map out your face shape, very useful indeed especially if you are new to the whole thing. Both the powders are very finely milled and because they have no glitter running through them you can really build the colour up and go as deep as you want. The highlighter is extraordinary, it can be scary applying something glittery to your nose and forehead but this is a dream when it hits the light your face glows. 

If I don't use this in the morning then I keep the compact in my handbag with me so that on the go I can use the handy little mirror as well as use the two shades to liven up my face after a long day. To apply I have been using the RT 300 Tapered Brush it carves my cheeks out perfectly and allows me to use a different angle for the highlight. 


Buy your very own here, go on I know you want to...
 
*PR SAMPLES*

NARS Lip Haul


NARS Lip Haul

NARS Lip Haul
NARS Lip Haul
It happened. I finally bought something from NARS. And of course they were going to be lips products but I am an addict after all. I went into the Harvey Nichols Beauty Bazaar in Liverpool which is glorious. Three floors of beauty, everything from MAC to Tom Ford it was like a dream come true. I wondered around for a little bit staring at everything but hearing my bank account cry at the same time - it was a struggle. I then came across the NARS counter and my heart was melting. Everything looked amazing the lovely assistant Shaolynn asked me what I was looking for today and I replied with 'A nude lipstick that doesn't wash me out'. 10 Minutes later she had applied a lipstick and a lip-gloss on my lips and they ended up in a shopping bag.

NARS Audacious Lipstick in Anita £24.00 - Harvey Nichols 
The NARS Audacious lipsticks are talked about a great deal and I finally understand the hype around them. First of all the packaging is out of this world, its a sleek black tube with NARS embossed on the outside and the lid is magnetic, which you could just play with for hours. Then my favourite bit is that the actual lipstick is engraved with the word NARS on. The feel of this lipstick is lovely, very creamy and luxurious.Shaolynn used a brush to apply it and I think I will be as well, just so that I don't use it all up.

NARS Lip-gloss in Chihuahua £19.00 - Harvey Nichols
After saying I will take the lipstick, she asked if there was anything else I wanted. I could have replied with 'everything' but instead asked her what she would recommend and that's how a lip-gloss became my second purchase. Its a colour that compliments the lipstick really well and both together don't wash my lips out instead make them look fuller and plump without the 'whole Kylie Jenner lip lining' that's what Shaolynn said not me. And she is 100% right, my lips looked glossy and gorgeous.

Even though it cost me £43 for just two products I couldn't be happier with them both, and I am on the rewards scheme so more points for me!

If you are ever in Liverpool go to the Beauty Bazaar it is every beauty lovers dream, I will definitely be popping back soon and looking at all the other brands they have on offer. For high end makeup I always got to HC because of the service and the very cute bags.