Cookie Policy
Privacy Policy

Blogmas Day 22 || Sally Hansen Nail-growth Miracle Serum Review♥

A while back now, I set myself a challenge to improve my nails which you can read in more detail here. But to tell you the truth I gave up around the end of August as I didn't really have the time to keep up with it all. Then when i was browsing the web I came across this Sally Hansen Nailgrowth Miracle Serum. I read a few reviews and decided to purchase it so that I would be able to use a product to really strength my nails. It claims to help the nails grow stronger naturally as well as perfecting your cuticles at the same time. The formula is enriched with biotin that allows the nails to become resistant to any damage! Everything that I wanted in one little bottle.
There are two ways of using this serum, you can either use the pipette and squeeze then massage on to your bare nails or on top of you nail colour which is the one that I have been doing more than the other. The end result? AMAZING! My nails have improved so much overall, they are so much more stronger, longer and defo more healthier. I knew that Sally Hansen was the best choice!
Sally Hansen Nail-growth Miracle Serum Review

Sally Hansen Nail-growth Miracle Serum ReviewSally Hansen Nail-growth Miracle Serum Review

Both my Left and Right hands

Blogmas Day 21 || DIY Wrapping ♥


We are nearly there my friends, 4 days to go till the big day! I am so excited and one thing that I love to do every year at the time is wrapping presents! Some people hate it, but I love it! When I went Xmas shopping a few weeks ago, I spotted lots of shops selling wrapping paper that looks just like parcel paper but fancy!
DIY Wrapping
Buy here
So I bought out the DIY queen that is inside of me and made my own version-ish! And it is super cheap and affordable and looks so different to anything else.
DIY Wrapping
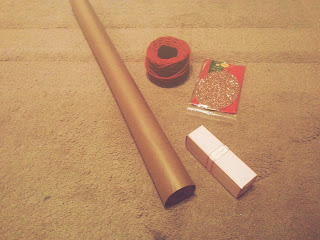
You Will Need;
- Parcel Paper Roll
-  Thick String/Ribbon
-Tags
- Present to Wrap
- Scissors
-Sellotape
DIY Wrapping
The first thing you want to do is cut out your parcel paper so that you have enough to wrap you present lik you would using wrapping paper. 
DIY Wrapping
Once its wrapped you can wrap your string or ribbon around it, I used red as I thought it looked really nice! But Silver,Gold, Black or even White would look really pretty as well. 
DIY Wrapping
When you've done that you want to attach your tag and write a sweet merry message on it and you've done! I think that it looks so pretty and works really together. 
DIY Wrapping
I actually ended up wrapping all my presents up, and it looks so pretty when it comes together and is under the tree!

Hope you enjoyed this very different blogmas post and I will see you all tomorrow! 


Blogmas Day 20 || Benefit Brighter&Badder Duo. ♥

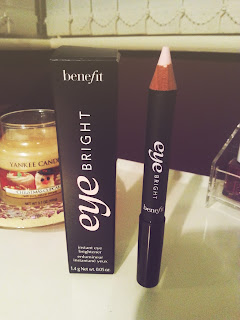
A few weeks back now I decided to buy something off the Benefit site as they had lots of Xmas offers going on and I decided to opt for the 'Brighter & Badder Duo' that comes with a full size BadGal Mascara and the eye bright pencil. I was very hesitant before clicking buy - but then thought ah what they hell! I can't find it online on the Benefit Wesbite any more but the sites below are where you can buy it. This was my very first purchase from Benefit and believe you me it did not disappoint. 
Here is a mini review and pictures of the kick ass products in action :) 
I am always looking tired and this pencil has saved me on a lot of concealer because of the bright colour it has saved me a lot of money and time if I am being honest and with the next few late nights coming up. no doubt I will be using it a lot!
Benefit Brighter&Badder Duo.
Benefit Brighter&Badder Duo.Benefit Brighter&Badder Duo.
Benefit Brighter&Badder Duo.


Blogmas Day 19 || Festive Nails #3 Rudolph the Red Nose Reindeer ♥


Festive Nails #3 Rudolph the Red Nose Reindeer
BarryM Nail Art Pen in White // Primark Black Nail Art Pen // NYC Top Coat // BarryM Cappuccino // BarryM Red Glitter // Rimmel Red Aim Paint // Sinful Colours Snow Me White (not pictured) // 
Festive Nails #3 Rudolph the Red Nose Reindeer

I decided to paint all my nails with the Rimmel red and then the ring finger with white and a Rudolph on my ring finger, I did it in such a messy way that I really didn't want to take pictures of it all step by step..I follow this tutorial from MissJenFABULOUS!